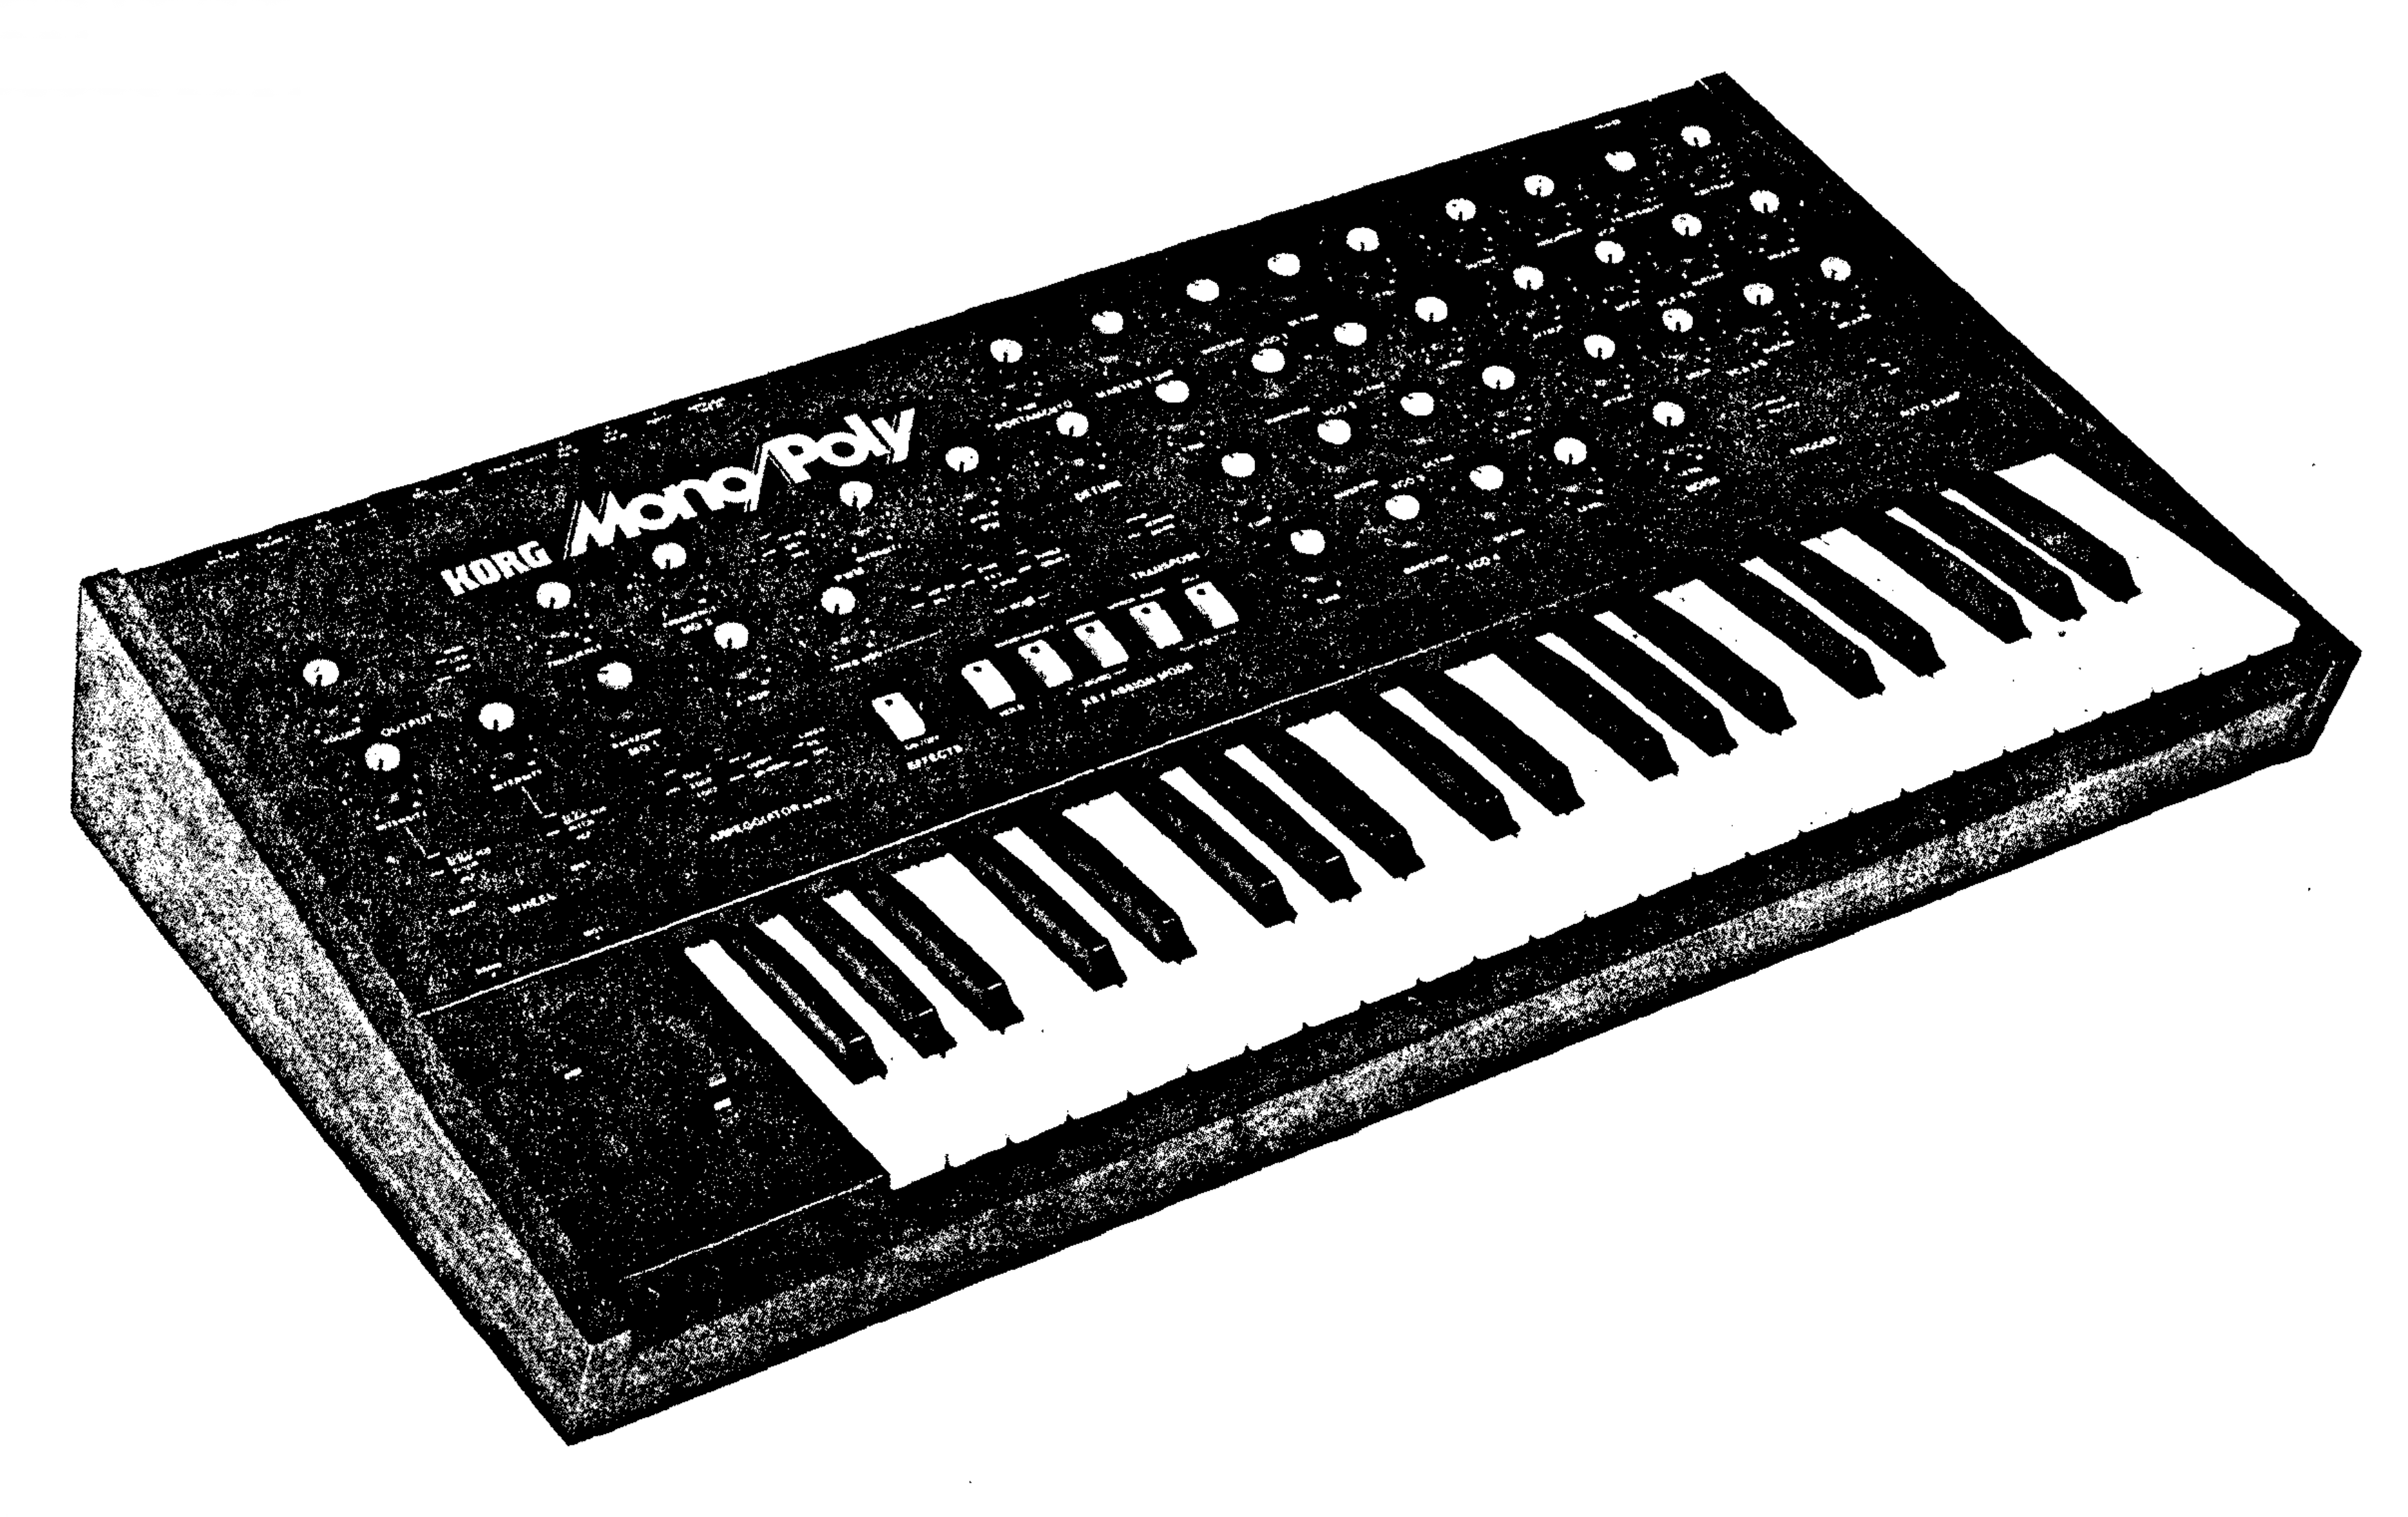
Background
Tuning instructions in the service manual are actually just fine. These are marginally easier to follow.
What you need
- A tuner that shows what note you’re playing, such as a guitar tuner. I use the Peterson Strobostomp.
- Digital voltmeter (DVM) for Key Assigner board (KLM-356) CV tuning
- Ordinary very small screwdriver, a little bigger Phillips screwdriver
- Speakers
Preparations
- Turn on your Mono/Poly, wait 10 minutes for warm-up
- Pitch Wheel = center, Modulation Wheel = 0, EFFECT = disabled
- VCO 1-4 TUNE potentiometers = centered
- Enable UNISON, set DETUNE = 0
- CUTOFF = 10, RESONANCE = 0
- Set VCO 1-4 LEVEL = 0
- EFFECTS = Off
Step by Step
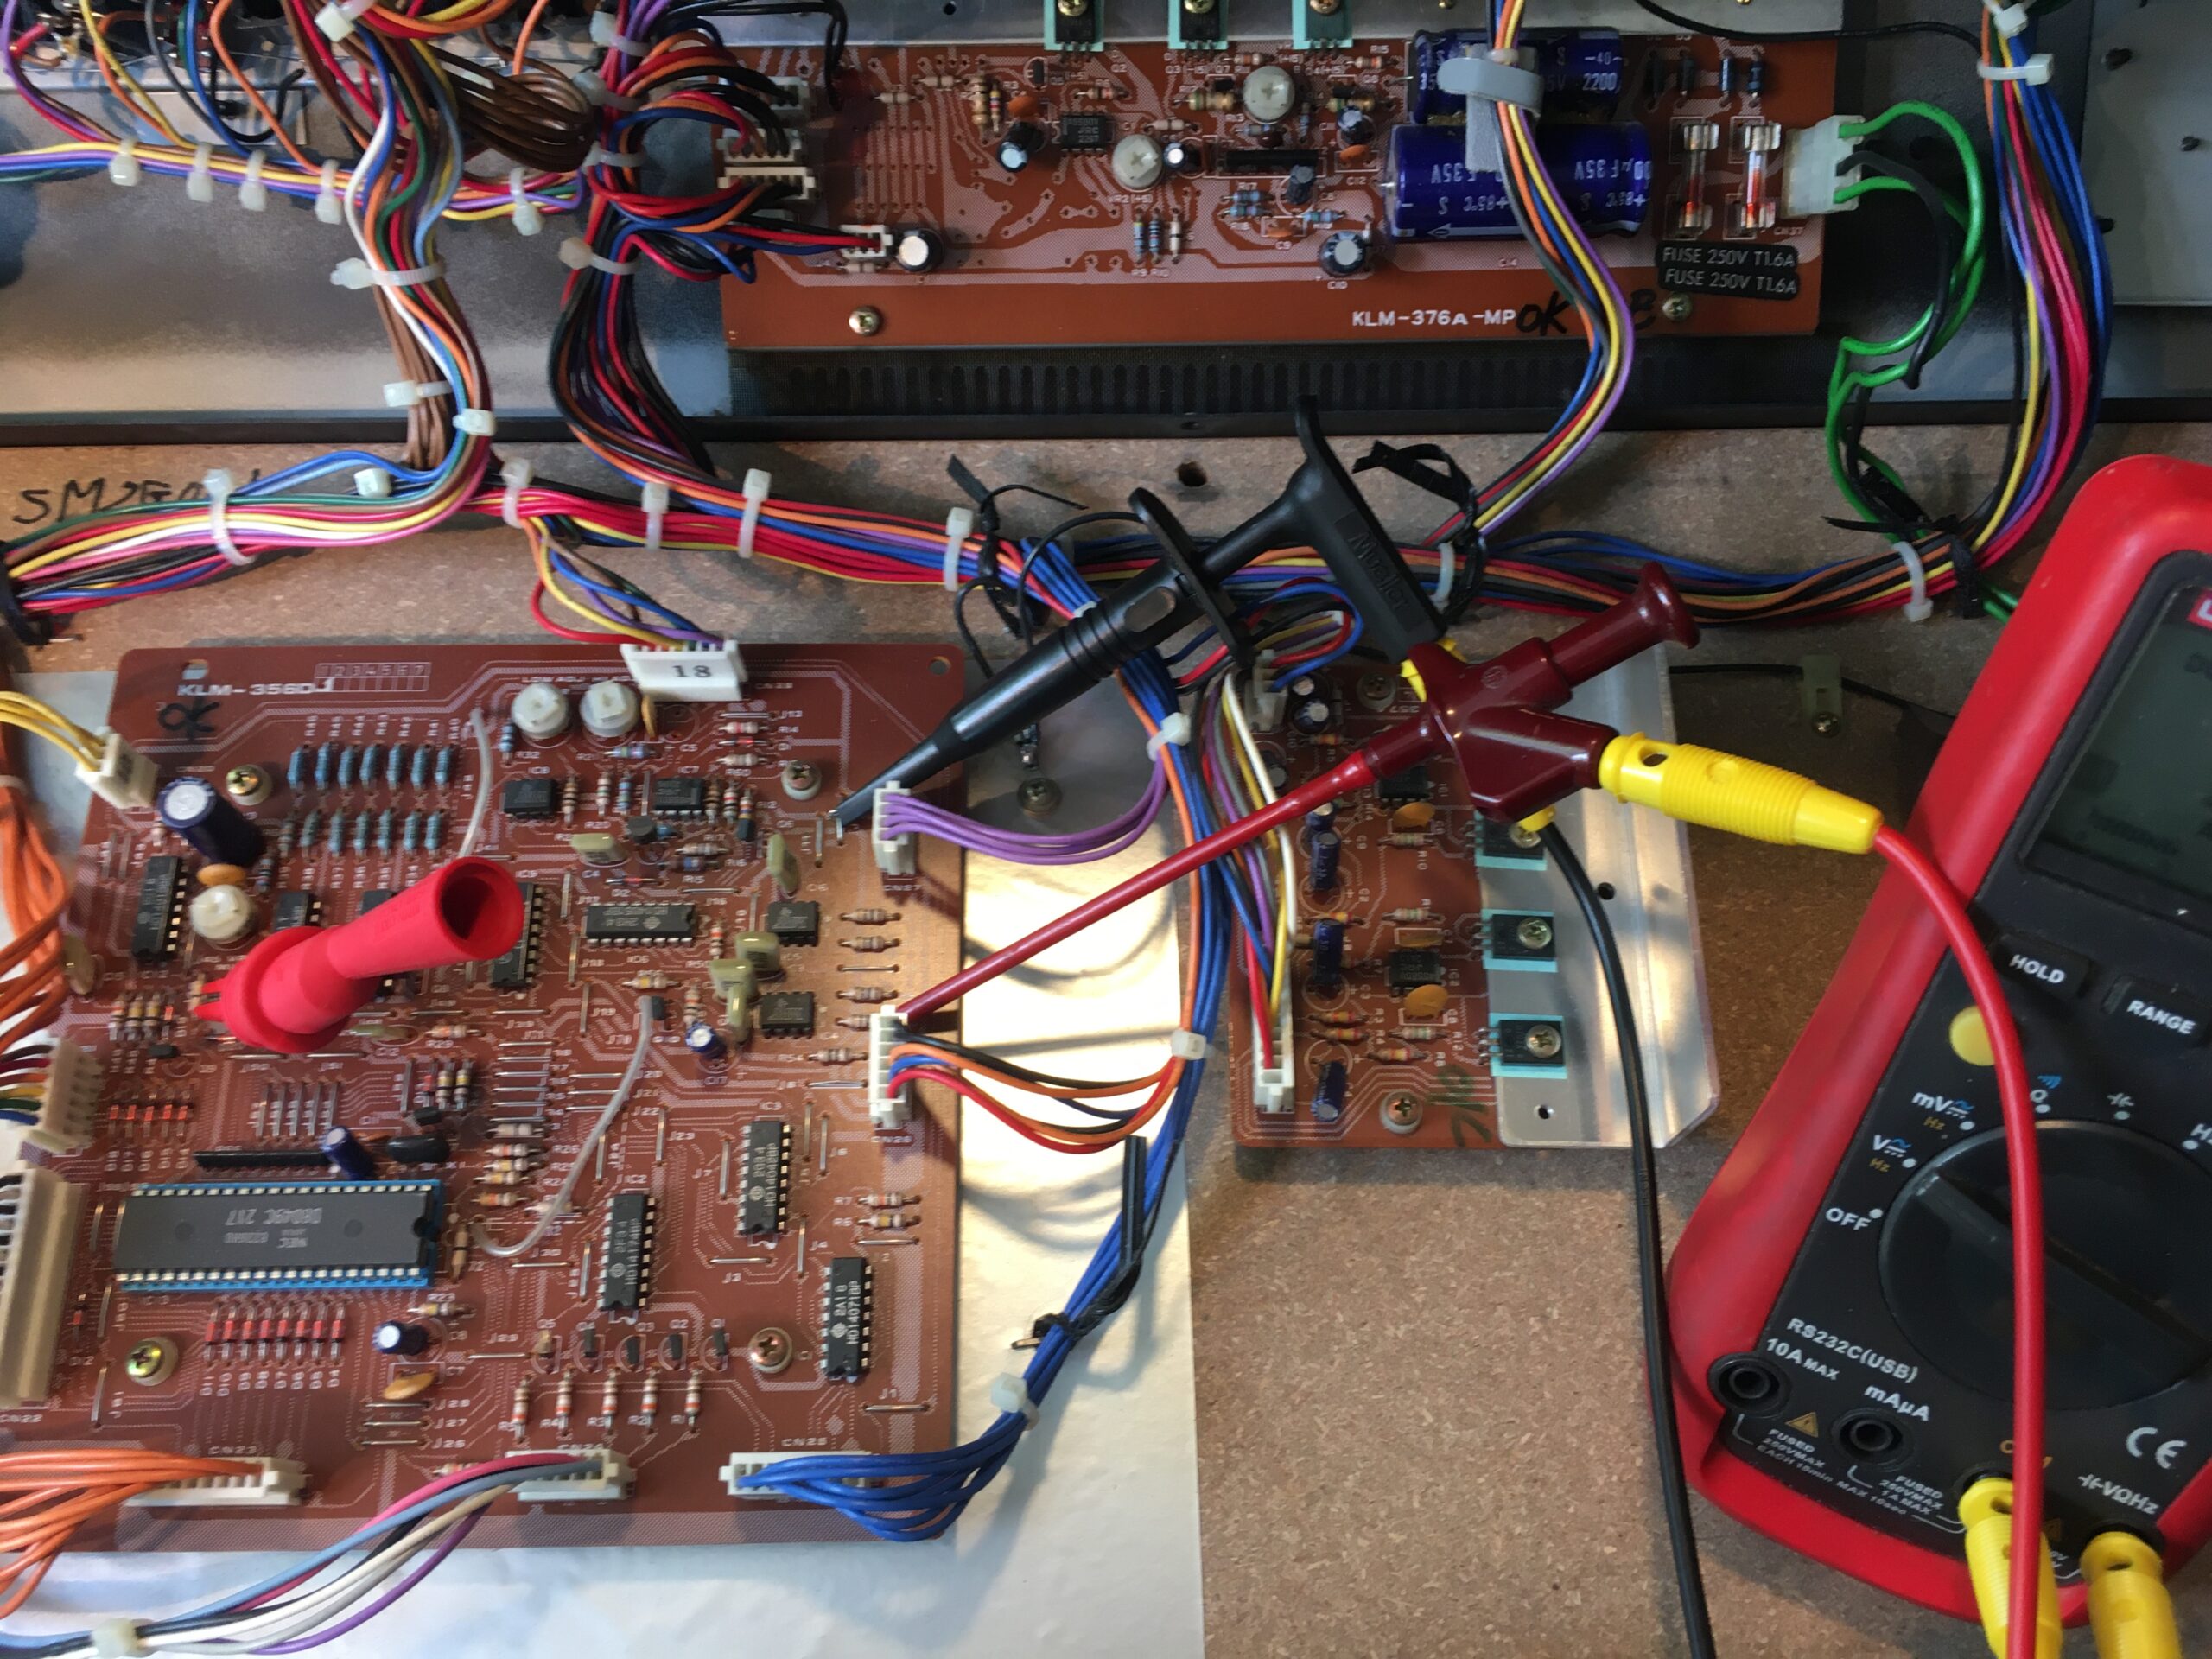
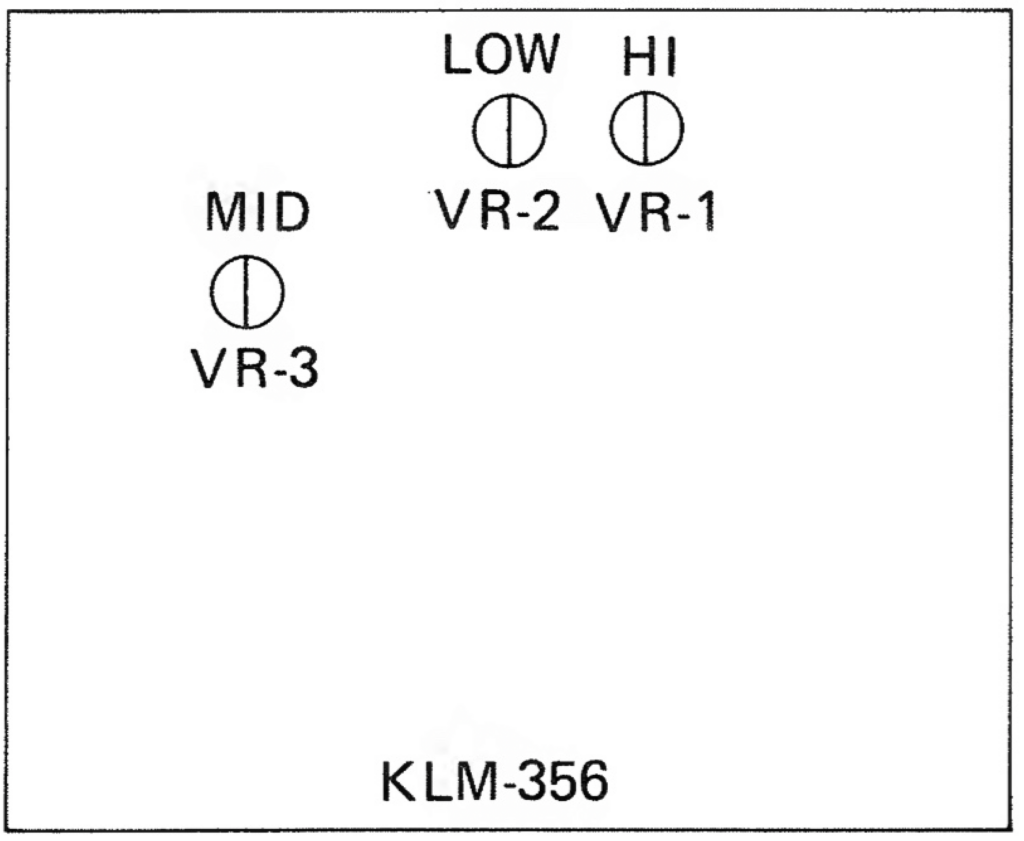
Step 1 – Key Assigner (KLM-256) CV
Connect the positive lead of your DVM (using a hook clip) to the right side of R8. Connect the DVM ground to GND at jumper wire J12. Short-circuit the so-called TUNE POINT.
On this particular Mono/Poly it was not possible to reach the correct values in the following procedure. Since there wasn’t time to troubleshoot KLM-356 I guessed at some other values and compensated in the next tuning step [Step 2 – KLM-398]. I’m not sure external CV input would work as expected, but it was secondary as the synth had to be ready for concert fast.
- All measurements are made at the right side of R8
- Move TRANSPOSE switch to UP. Aim for 10.583V, using VR-1 (I used 10.500V)
- Move TRANSPOSE switch to DOWN. Aim for 0.000V, using VR-2 (I used -0.020V)
- Move TRANSPOSE switch to NORMAL. Aim for 5.250V, using VR-2 (5.220V)
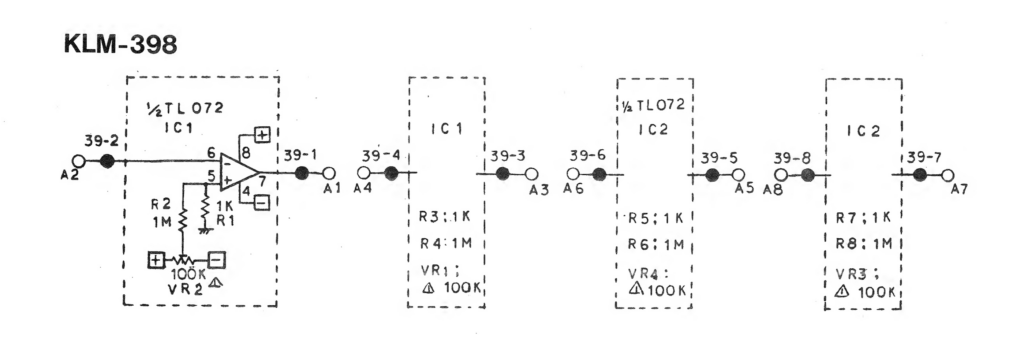
Step 2 – Condition & Compensate (KLM-398)
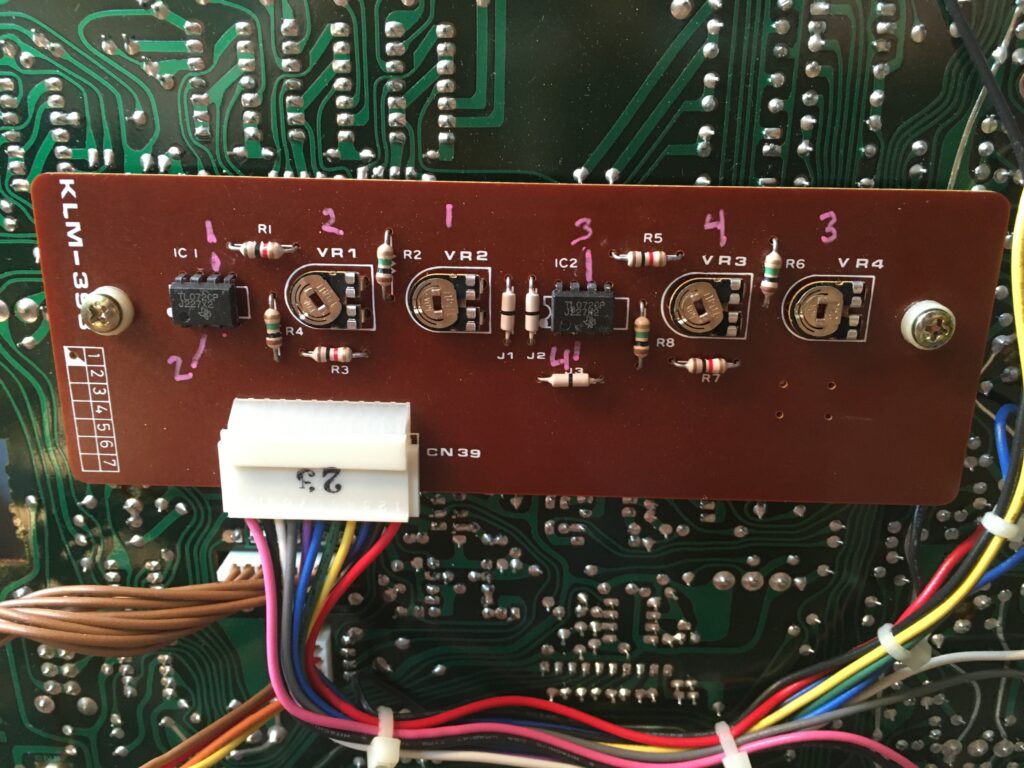
The Key Assigner’s pitch voltages are conditioned once more before reaching the VCOs. This is done on the piggyback board KLM-398. Instructions can be hard to follow – it’s almost diabolic how Korg labelled the trimmers in relation to the voice numbers.
- Remove the shorting clip on the KLM-256
- Press lowest C (probably unnecessary step)
- Voice 1 (in pink marking): Measure pin 6 on IC1 and turn VR-2 for 0 volts
- Voice 2 (in pink marking): Measure pin 2 on IC1 and turn VR-1 for 0 volts
- Voice 3 (in pink marking): Measure pin 6 on IC2 and turn VR-4 for 0 volts
- Voice 4 (in pink marking): Measure pin 2 on IC2 and turn VR-3 for 0 volts
Step 3 – Tuning VCO 1-4 (KLM-354)
Remember: DETUNE = 0, all VCO TUNE = centered all modulation off, KEY ASSIGN MODE = UNISON
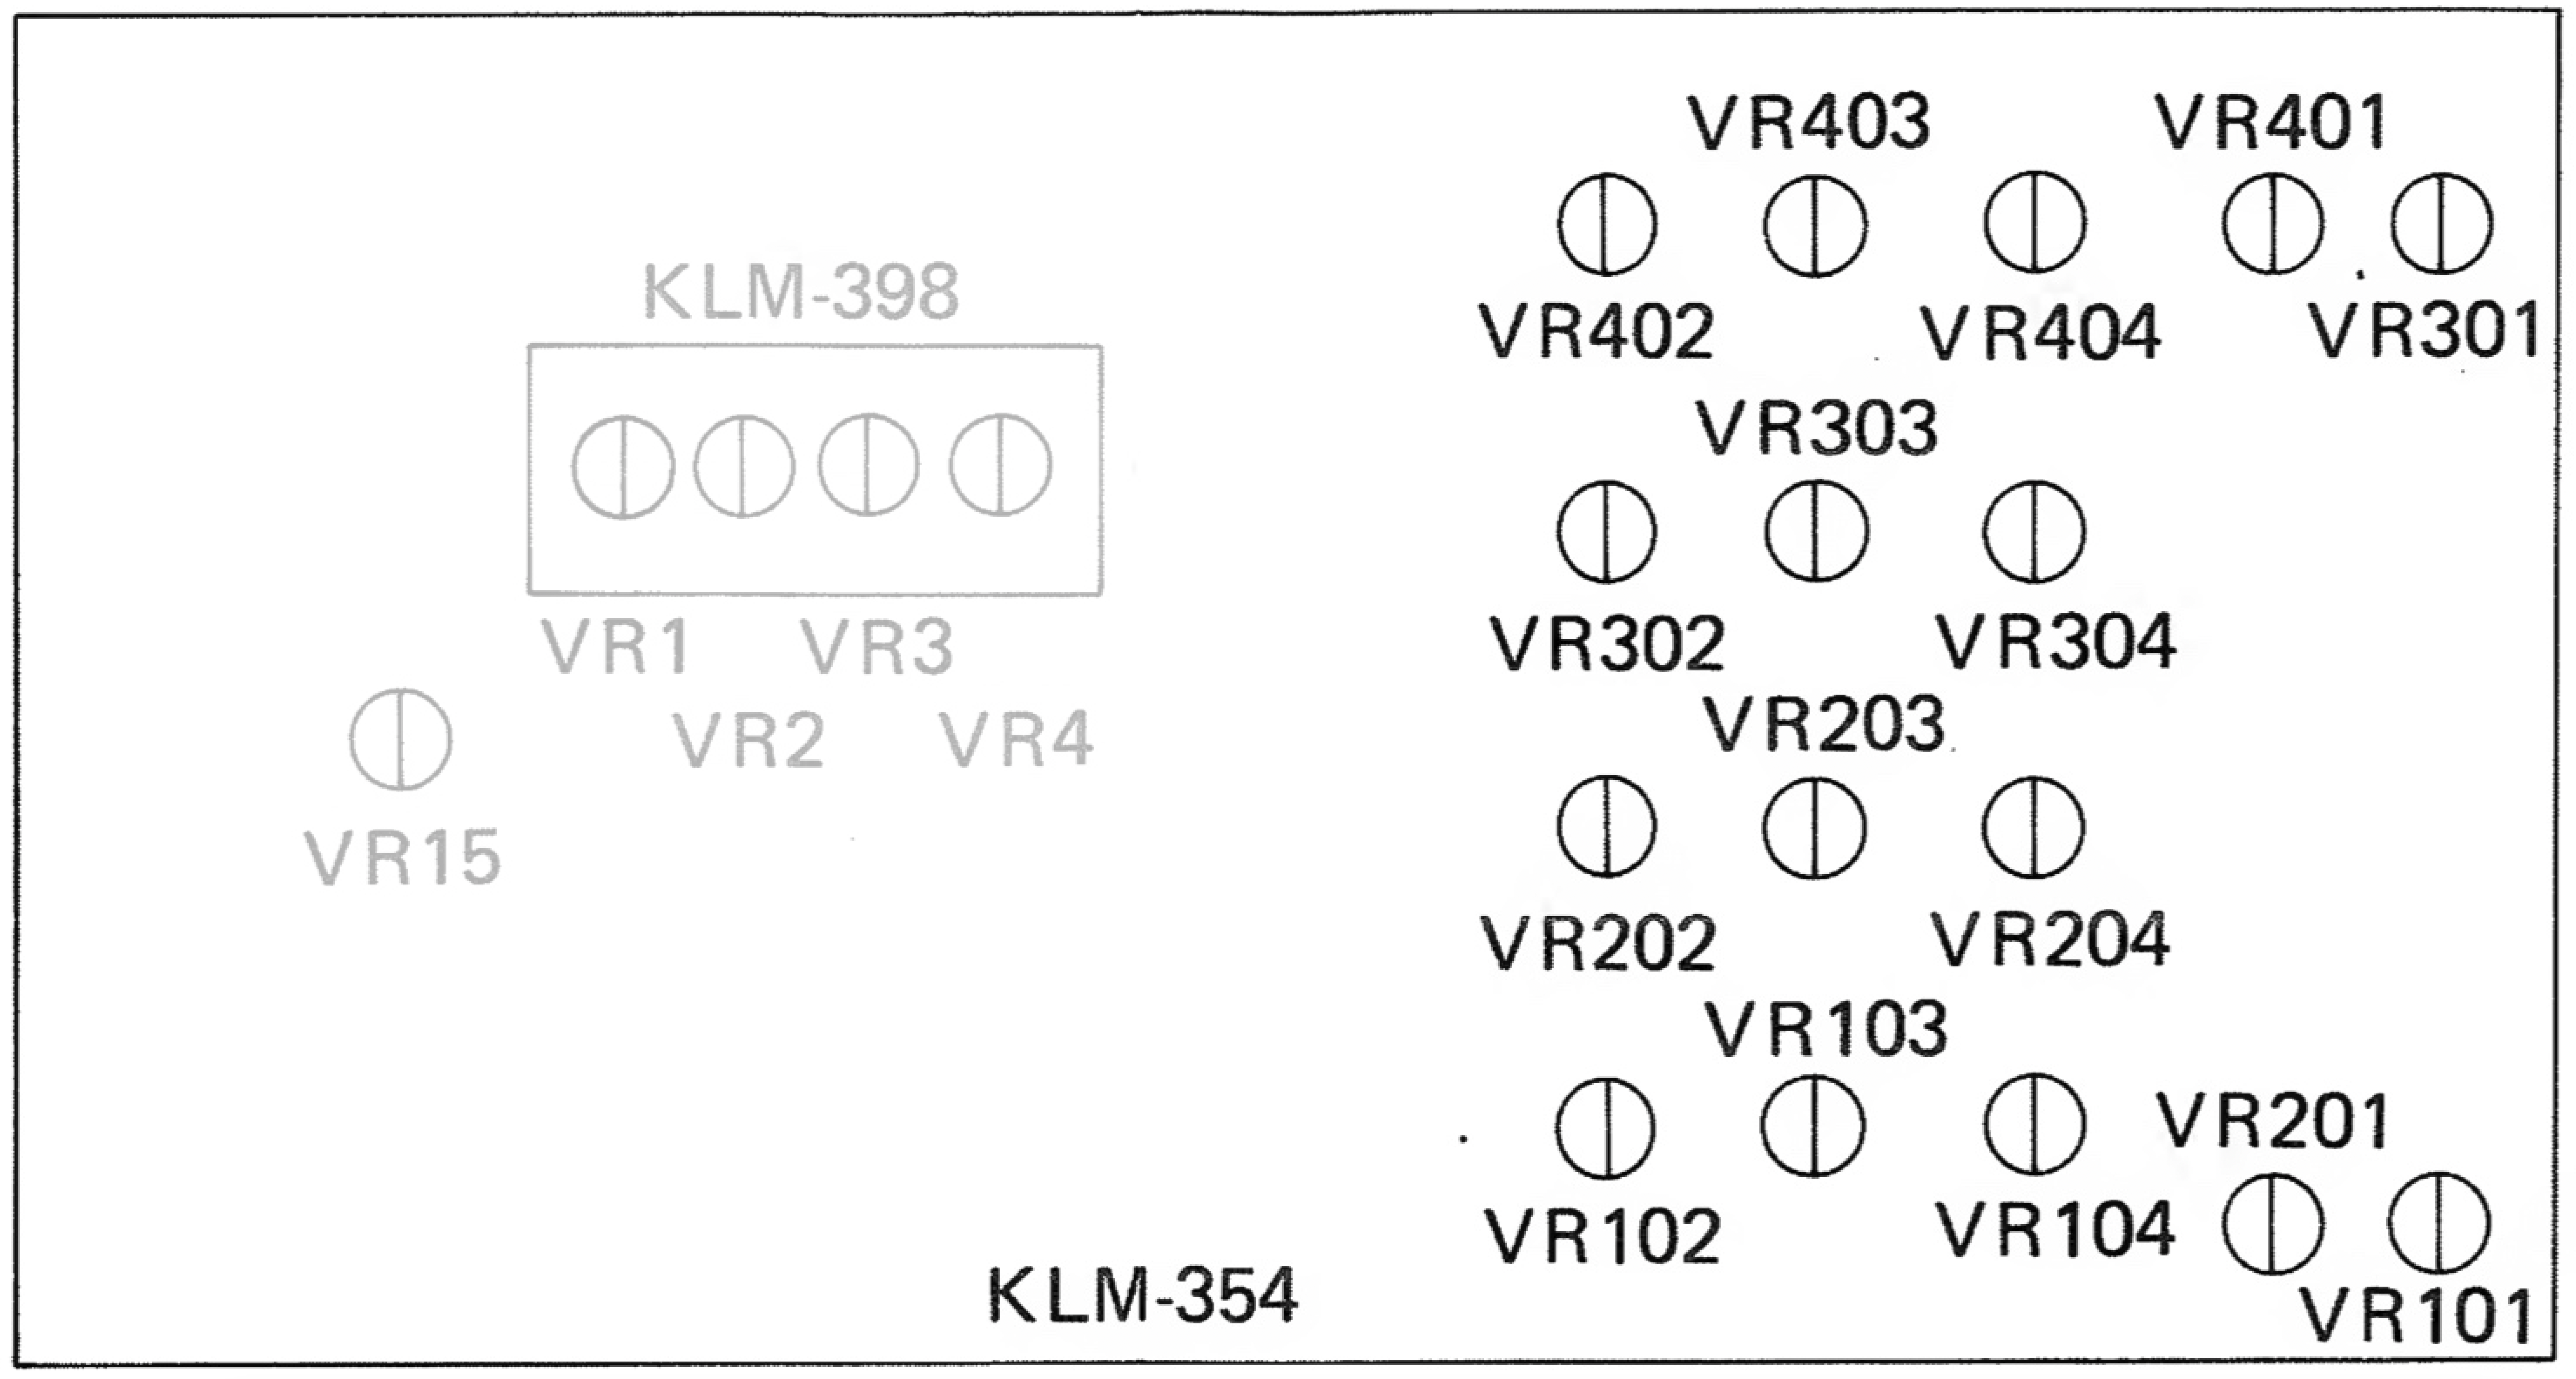
VCO 1
Set VCO 1 LEVEL = 10
| Action | VCO 1 OCTAVE switch | Hold down key | Adjust |
| 1 | 16′ | Lowest F | VR-103 |
| 2 | 16′ | Highest C | VR-102 |
| Repeat 1-2 | |||
| 3 | 2′ | Lowest F | VR-101 |
| 4 | 2′ | Highest C | VR-104 |
| Repeat 3-4 | |||
| Repeat 1-4 |
VCO 2
Set VCO 1 LEVEL = 0. Set VCO 2 LEVEL = 10
| Action | VCO 2 OCTAVE switch | Hold down key | Adjust |
| 1 | 16′ | Lowest F | VR-203 |
| 2 | 16′ | Highest C | VR-202 |
| Repeat 1-2 | |||
| 3 | 2′ | Lowest F | VR-201 |
| 4 | 2′ | Highest C | VR-204 |
| Repeat 3-4 | |||
| Repeat 1-4 |
VCO 3
Set VCO 2 LEVEL = 0. Set VCO 3 LEVEL = 10
| Action | VCO 3 OCTAVE switch | Hold down key | Adjust |
| 1 | 16′ | Lowest F | VR-303 |
| 2 | 16′ | Highest C | VR-302 |
| Repeat 1-2 | |||
| 3 | 2′ | Lowest F | VR-301 |
| 4 | 2′ | Highest C | VR-304 |
| Repeat 3-4 | |||
| Repeat 1-4 |
VCO 4
Set VCO 3 LEVEL = 0. Set VCO 4 LEVEL = 10
| Action | VCO 4 OCTAVE switch | Hold down key | Adjust |
| 1 | 16′ | Lowest F | VR-403 |
| 2 | 16′ | Highest C | VR-402 |
| Repeat 1-2 | |||
| 3 | 2′ | Lowest F | VR-401 |
| 4 | 2′ | Highest C | VR-404 |
| Repeat 3-4 | |||
| Repeat 1-4 |
Conclusion
Done. Turn up all VCO LEVELS and play in Unison. Use DETUNE to detune the four oscillators for fat sounds. It should be possible to get a very accurate tuning over a range of five octaves or more. It’s a very exact synth.