Reason
In some cases USB cannot be used to program (upload hex file to) a processor on an Arduino board. One such case is when you are targeting the second processor on an Arduino Uno, the ATMega16u2 whose sole purpose is to cater for USB communication.
Please note: Only the original style Arduino Uno R3 boards have an ATMega16u2 processor, so be sure to use one of those for target.
Another case arises after we succeeded in reprogramming the USB chip. In my case it will become a MIDI communication chip, so USB connectivity is lost and the main processor (ATMega328p) will also have to be programmed with ISP (In-System Programming).
Parts list
• Arduino IDE (I used arduino.cc 1.6.7 but any fairly modern will do)
• 2x Arduino Uno R3 (one programmer and one target)
• Hacked ICSP flat cable
• 3x LED / 3x 1k resistors (optional)
More info on the ISP / ICSP cable and connections at Nick Gammon’s
Using an Arduino board as ISP
Step 1, create an ISP programmer
Locate the ArduinoISP example sketch in the Arduino IDE. Upload it to the Arduino board that is to become the programmer. (The programmer board doesn’t necessarily have to be an original Uno, it may use an FTDI232 or CH340 chip for USB communication.)
Step 2, connect the boards
To upload a hex file to the USB-chip (m16u2 aka ATMega 16u2) on an Arduino Uno, you need to connect the programmer’s ISP header to the target board’s second ISP header. (If there is only one 6-pin ISP-header, you don’t have the original UNO.)
Step 3, upload hex file
Shell command
Uploading a pre-compiled hex file to the m16u2 USB controller on an Arduino Uno R3 board, using avrdude and an “Arduino as ISP”-programmer to target the m16u2.
/path/to/avrdude -C /path/to/avrdude.conf -v -p m16u2 -c stk500v1 -P /path/to/serial/port -b 19200 -U flash:w:/path/to/hex/file.hex
Example
What you see is:
Using Terminal on Mac OS X
Uploading Hiduino midi firmware
from the folder “jobb/EMS/”
Using the “avrdude” that comes bundled with Arduino IDE
Using /dev/cu.wchusbserial410 (the serial port of the “Arduino as ISP”-programmer)
/Applications/Arduino.app/Contents/Java/hardware/tools/avr/bin/avrdude -C /Applications/Arduino.app/Contents/Java/hardware/tools/avr/etc/avrdude.conf -v -p m16u2 -c stk500v1 -P /dev/cu.wchusbserial410 -b 19200 -U flash:w:/Users/gaunitz/Documents/Jobb/EMS/hiduino-master/compiled_firmwares/arduino_midi.hex
The hard part is to get the file paths right. To get some hints, go to the Arduino IDE preferences and turn on “Show verbose output during -> Upload”. Then upload any sketch to an Arduino, and examine the log output.
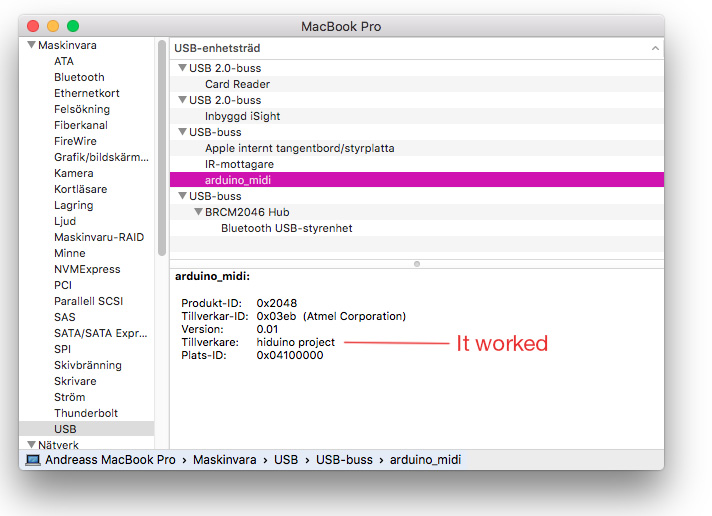
After uploading the firmware I connected the target board to the computer with a USB cable and had a look in System Report:
The ATMega16u2 became a generic midi device, communicating with the ATMega328p :)
